
The Comprehensive Testing Environment for X/Motif Applications, Replay Xcessory (formerly QC Replay) combines true widget awareness, a non-proprietary scripting language and automatic synchronization to provide object-based capture/playback verification of your most sophisticated applications.
Once you have loaded your application in Replay Xcessory, you can perform tests by manipulating and storing the behavior and state of each and every widget for a particular sequence of user actions. You can "record" these user actions in test scripts, which capture user behavior as it affects the widgets. You can then "replay" the test script to replay the behaviors (the clicks, drags and moves) that were done to each widget. In other words, you do not have to manually repeat the same set of actions to repeat a test; you can just run the script again. You can also write scripts that simulate user actions.
After you record a baseline snapshot of the correct results for a particular behavior, you can replay the test script and generate a report that compares the outcome to the baseline results.
You can use snapshots to compare test results. Snapshots provide a picture of the screen that results from user actions. Replay Xcessory snapshots save your application at the widget level; that is, they describe the X resources and their values. This kind of "logical" snapshot is usually more portable and easier to maintain than literal bitmap images, which are also an option with Replay Xcessory.
The purpose of this document is to provide a quick tour of Replay Xcessory. After you read this document, you will be able to start testing your own applications. The following topics are covered in this tour:
- Starting Replay Xcessory
- Understanding the Replay Xcessory Test Manager Window
- Using Replay Xcessory Help
- Setting up a Test Package
- Recording
- Setting up the Recording Session
- Recording the Script
- Viewing the Test Package
- Playback
- Examining the Results
- Viewing a Test Report
- Identifying Test Results
- Exiting
- Troubleshooting
- Additional Features
- Using Replay Alone
- Using Replay Xcessory with Your Application
- Starting up Replay Xcessory with the Replay Driver
- For Further Help
Starting Replay Xcessory
To install Replay Xcessory, follow the directions provided in the Installing and Managing ICS Products manual. If you wish to use Replay without the Test Manager, see the appendix of this document for further instructions on setting up Replay Xcessory.
For this example, you can launch Replay Xcessory from the Replay Xcessory Test Manager, which you start by invoking the following command:
The best way to use Replay's commands is to put path_where_Replay_installed/bin directory on your path.
$REPLAYHOME/bin
Understanding the Replay Xcessory Test Manager Window
The Replay Xcessory Test Manager opens to a user defined test suite. The default test suite, included with the installation, appears as shown:
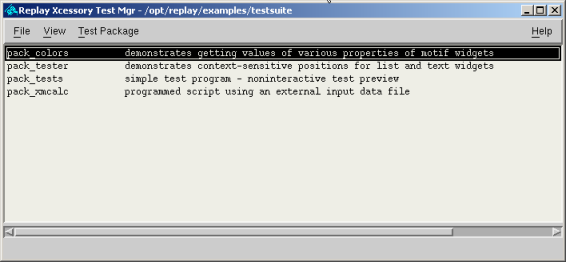
There is no limit on the number of test suites a user can create. Each line in the test suite represents a test package.Each test package may contain any number of test cases. Test cases consist of the files and directories associated with a recording session.
Using Replay Xcessory Help
Replay Xcessory provides context sensitive help to assist you in using the product. To get information on any window, select Help from the Help menu for a window or select the Help button. A Help window appears describing how to use that window.
Setting up a Test Package
To illustrate the use of Replay Xcessory, we'll record and replay a test of the xmcalc program in the testsuite directory.
To create a test package for this example, select New Test Package... in the Test Package menu.
The Test Package dialog box appears:
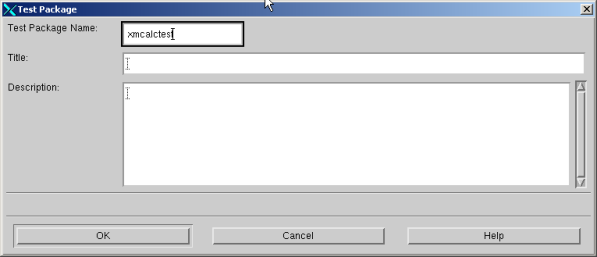
For this example enter the following information:
- In the Test Package Name area, enter a name, such as xmcalctest, as the name of the directory for the new test package.
- In the Title area, enter a single-line description. This will appear as one of the lines in a directory listing.
- In the Description area, describe the test package in as much detail as necessary. This information, along with the Title information, appears in a testpackagename.tpd file in the new test package directory.
- Select OK to complete test package creation.
An empty Test Package window appears:
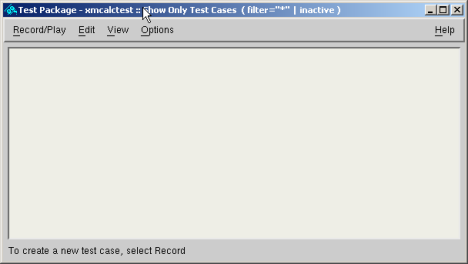 �
�Recording
To start a recording session for the xmcalctest test package, select Record ... from the Record/Play menu in the Test Package window.
A Record Control Panel Description page appears, as shown:
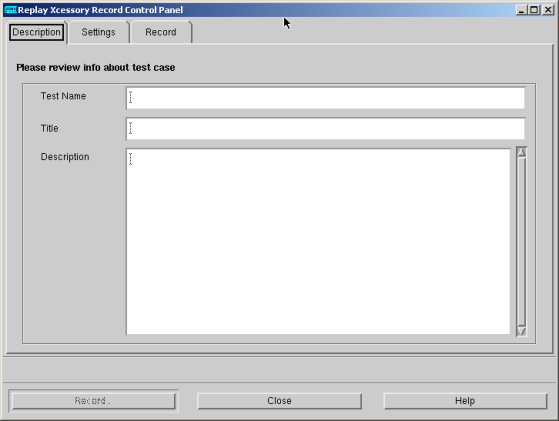
In this recording session, you create a script file and baseline snapshots for test case verification.
Setting up the Recording Session
Here are the steps to record a script containing two calculations using the xmcalc program:
-
In this section, only the requirements for recording a script will be discussed. There are other options in these menus that can be set. For more information on these settings, see the Replay Xcessory User's Guide.
- In the Test Name area, write the name of the test. This is required. In the Title area, write the title of the test, such as testcase. This can be omitted if desired. You may fill out the Description area with a description of the test if you wish, although this is not required.
- Click to the Settings page, as shown:
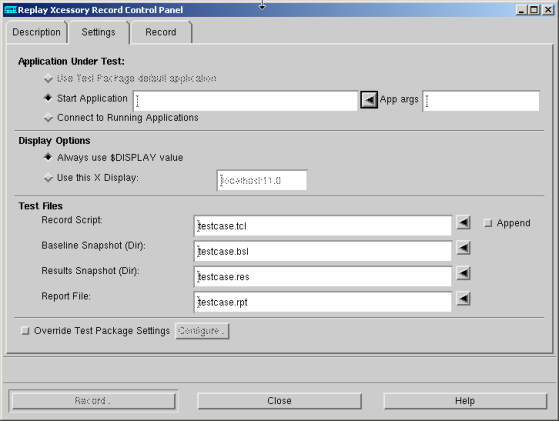
-
In the Application Under Test area, place the cursor in the Start Application box and type the path to the AUT (xmcalc). Alternatively, you can select the arrow to the right of the test field to browse to the AUT. There are only executable files available for you to choose.
-
The Display Options area is set to the location of the display being used. The default is "Always use $DISPLAY value".
-
The Record Script area (.tcl extension), the Baseline Snapshot (Dir) area (.bsl extension), the Results Snapshot (Dir) area (.res extension), and the Report File area (.rpt extension) are by default the test case name you specified on the Description page. You may change these names if you like, although it is often easier to organize the files if all files relating to the same test case have the same name.
- The snapshots taken during this recording session will be placed in the directory specified in the Baseline Snapshot area and used as the baseline snapshots for the subsequent play session.
- Press Record to begin recording the script.
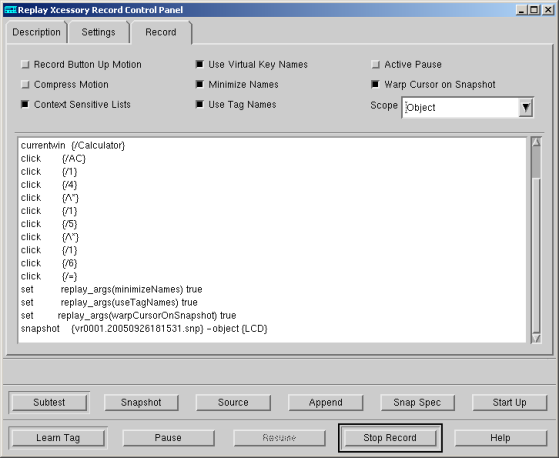
Two things occur: the main window of the calculator appears, and the buttons along the bottom of the record control panel change to a new set of buttons that allow you to control the record session itself. For example, there are buttons to mark the beginning of a test case, take a snapshot, pause, and so on.
Here's an illustration of the Record Control Panel as it appears while you are recording:
Recording the Script
To record a test script, follow these steps:
- In the calculator application, multiply 14 times 15 times 16 by selecting the following buttons: AC, 14, *, 15, *, 16, =.
- As the calculator keys are pressed, the generated script appears in the scrollable area in the Record Control Panel.
- In the Record Control Panel, select the Snapshot button to save the results of this calculation as a snapshot.
- Notice that the Snapshot Scope field defaults to Object, which means that widget values will be saved. See the Replay Xcessory User's Guide for more information about snapshot scopes.
- The cursor changes to resemble a camera.
- Move the cursor over the LCD area of the calculator; this area displays the results of a calculation. With the top left corner of the cursor is over the area, click.
- Replay Xcessory takes a snapshot of the LCD widget only (while the snapshot scope is set to object).
- Divide 7 by 2 by selecting the following buttons on the calculator: AC , 7 , / , 2, = .
- Again, select Snapshot and click the camera cursor over the LCD area of the calculator. Note that it is the top left edge and not the center of the camera cursor that is being snapped.
- Exit from the calculator by choosing Close from the window manager menu, or click the right mouse button on AC.
- Select the Stop Record button, at the bottom of the Record Control Panel to end the record session.
- Select the Close button to dismiss the Record Control Panel.
Viewing the Test Package
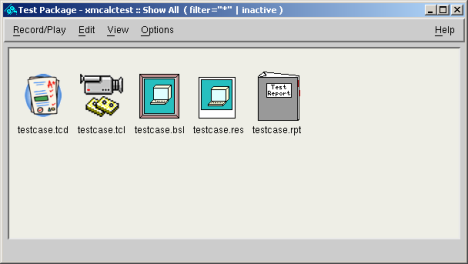
The Test Package window now appears as shown:
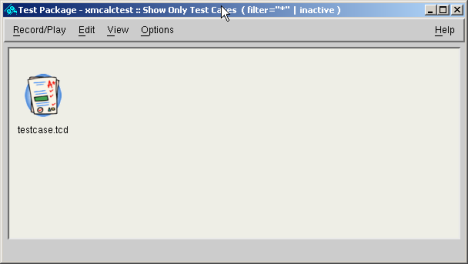
There is only one icon in the Test Package Window, which represents the Test Case "testcase" that was just created. To show all the files in the current test package, click on the empty space below the existing icon and select Show All in the popup menu. The current window changes to the next view:
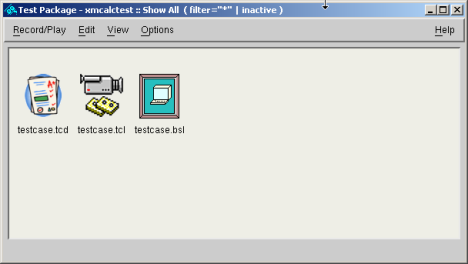
In the recording session, you created a script file and baseline snapshots for test case verification. You now have everything that is necessary for a play session.
Playback
To begin a play session, click on the test case icon and select Play... from the Record/Play menu in the Test Packagewindow, or just double-click on the test case icon.
The Play Control Panel opens as shown:
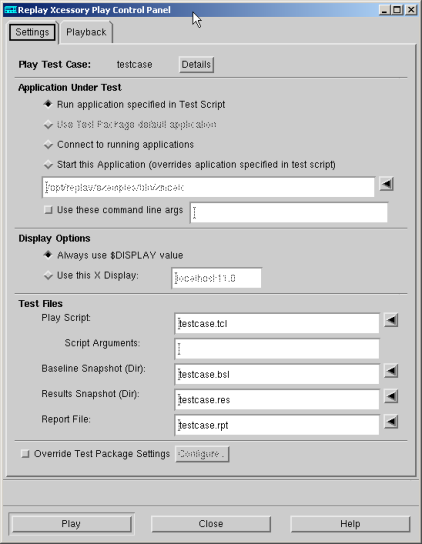
Replay Xcessory knows which application to run on playback from the recorded tcl script, but you can change the program by selecting the Start this application option and specifying the desired application. By default the Baseline Snapshot (Dir) area is set to testcase.bsl , the directory used in the record session, the Play Script: area has the script name, testcase.tcl, the Results Snapshot (Dir) area is set to testcase.res, and the Report File is set to restcase.rpt.
To replay the script, follow these steps:
- Select the Play button to start the script and generate results.
As the script begins, the play control panel expands to show a script view area just below the speed selector. As the script is replayed, the script commands appear in the script view area and the state of the application GUI changes. For instance, the cursor moves over the calculator buttons being pressed.
The play speed will seem slow if there were pauses while recording. To rerun the play session at a faster rate, adjust the play speed scale on the play control panel. Drag the slider to the right towards 1.0 before pressing the Playbutton.
When the script is finished, exit from the Play Control Panel by selecting Stop and then Close.
Examining the Results
After you complete the example record and playback of the xmcalc test package, the Test Package window appears as follows:
Viewing a Test Report
The report icon is named with the .rpt suffix. Since you provided baseline snapshots and requested a report file, the report file should indicate--based on snapshot comparisons and other possible conditions specified by the test case creator--whether the tests were successful.
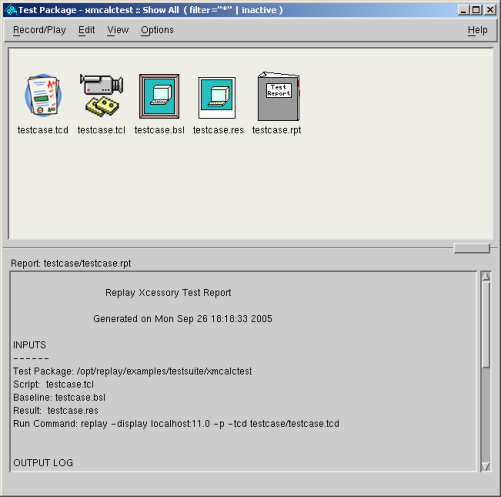
To look at the test report, double click on the report icon in the Test Package window, or select the icon and then select View Object from the View menu.
A view pane opens from the bottom of the Test Package window, displaying information similar to the following:
Identifying Test Results
To find out whether your tests succeeded, scroll through the .rpt file until you view the "OUTPUT LOG" section, which shows you the outcome of comparisons between the snapshots and the baseline. The comparisons are in the form ofdiff statements for logical snapshots and xwddiff statements for image snapshots. If there are no differences the output is labeled "Passed".
Here's an illustration of the output log for the testcase.tcl script:

The report also has a summary, which shows percentages of tests with various outcomes. The possible outcomes are "Passed" and "Failed".
Exiting
You can close the Test Package window by selecting Close from the Record/Play menu.
Then you can exit the Replay Xcessory Test Manager by selecting Exit from the Test Package menu in the Test Managerwindow.
Troubleshooting
This section describes some common problems and their solutions.
|
Symptom |
Suggested action |
|---|---|
|
Nothing is recorded when you run thexmcalcexample |
Make sure that the version of xmcalc being executed is the one in the $REPLAYHOME/examples/bindirectory. You can use the which command to find out which xmcalc you are running or check whether the program that you are trying to run is linked against the shared libXt or against the customized static libXt, which can be found in REPLAYHOME/lib/Xt. |
|
Nothing is recorded when you run your application |
Confirm that setuid programs are statically linked with the Replay Xcessory Xt library. They must be statically linked with Replay because these programs typically ignore the library path environment variable. Programs spawned by the setuid program must also be statically-linked with the Replay Xcessory Xt library as they do not inherit the library path. If you need to test an application started by a shell script, ensure that your script follows the following format: |
Additional Features
This Quick Start shows you how to get started using the Replay Xcessory Test Manager for widget-based testing. In addition, you can use Replay Xcessory to perform the following advanced tasks:
- Debug test scripts
- Control the scope and granularity of Replay Xcessory snapshots
- Run test scripts you have written using Tcl (a tool command language)
- Run test suites in batch mode, using Replay Xcessory's command language
- Use virtual and pseudo X servers for background testing
- Use source debuggers to debug your application during play sessions
- Record and play back applications that use custom widgets
- Extend Replay Xcessory's command language to include custom Tcl commands
- Operate on objects, not on screen location
- Copy and link test cases
See the Replay Xcessory User's Guide for more information about these topics.
Using Replay Alone
This section is a quick guide to using the Replay driver alone instead of using with the Replay Test Manager, replaytm. A user who prefers to use replaytm may skip this section of the Replay Xcessory Quick Start guide.
Using Replay Xcessory with Your Application
To use Replay Xcessory you must make sure that your application uses a Replay Xcessory version of the Xt libraries, in case it is linked statically, instead of the regular version.
Starting up Replay Xcessory with the Replay Driver
You can use Replay Xcessory as a standalone product by typing the following command:
replay -r -tcd testcase
Using the -r option starts a recording session. Omitting the option starts a play session.
For Further Help
See the Installing and Managing ICS Products manual for information about installing Replay Xcessory.
See the Replay Xcessory User's Guide for more details about Replay Xcessory.
Use the UNIX man command to view manual pages for the replay and other shell commands and the Tcl commands.